Logging in
Overview
Teaching: 30 min
Exercises: 5 minQuestions
How do I quickly connect to Blue Waters?
Objectives
Connect to Blue Waters using
sshcommandSave
sshconfiguration in a fileUnderstand what X11 forwarding is and how to enable it with
ssh
You should have received an account on Blue Waters in advance of this lesson. In simplest terms, an account on any system means two things: a username and a password, and you probably know what both of these are. However, because security is of a primary concern, standard Blue Waters accounts use the so-called two-factor authentication. What this means is that your “password” is, in fact, made of two components:
- PIN: the part that you control
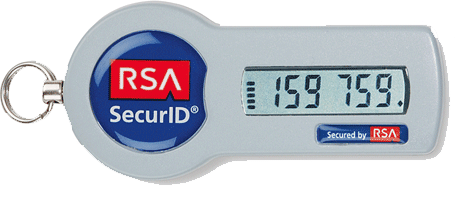
- TOKEN: 6 (or 8) digits that are generated every 30 seconds either by a special hardware RSA token or your mobile device.
So, when you’re asked to provide your password (or PASSCODE), you have to enter your PIN followed by a TOKEN.
Training accounts do not have two-factor authentication and, therefore, if you’re using such an account you don’t have to enter the TOKEN.
Set the PIN
If you have not done so already, you can set you PIN at http://otp.ncsa.illinois.edu. There, enter your Blue Waters username and press Return, then enter your token and hit Return again. On the new page you will be asked to specify your PIN.
Connecting to Blue Waters
Unlike regular computers, supercomputers like Blue Waters are designed to be accessed remotely only. To do that, we need a terminal (or a terminal emulator if you are on a Windows machine). Let’s open it up (plese refer to our Setup page for more information). What you see in front of you is called a shell: this is a program that executes other programs.
To connect to Blue Waters we will use a program called ssh, which is short for Secure SHell.
The general syntax for connecting to any remote machine using ssh command is:
$ ssh -l username remote-machine-address
Here, username is the your username on that remote machine.
Note, that there is an altenative syntax for the above command:
$ ssh username@remote-machine-address
The Blue Waters system’s address is bw.ncsa.illinois.edu for standard accounts and
bwbay.ncsa.illinois.edu for training accounts. Thus, all we have to do to connect
to Blue Waters is execute the following command:
$ ssh -l username bw.ncsa.illinois.edu  # for standard accounts
$ # or
$ ssh -l traXXX bwbay.ncsa.illinois.edu # for training accounts
Access by OTP or Two Factor Certificate Authority only.
Use myproxy-logon -s tfca.ncsa.illinois.edu -p 7512 for gsissh access.
gsissh or ssh -o PreferredAuthentications=keyboard-interactive for otp access.


Blue Waters Admin Team


Enter PASSCODE:
Enter your passcode as we discussed above and hit Return. You should see a message similar to the one below:
Last login: Fri May 9 10:11:12 2018 from your.computer.address

   ___  __           _      __     __
  / _ )/ /_ _____   | | /| / /__ _/ /____ ___  ___
 / _  / / // / -_)  | |/ |/ / _ `/ __/ -_) __)(_-<
/____/_/\_,_/\__/   |__/|__/\_,_/\__/\__/_/ /___/
~~~~~~~~~~~~~~~~~~~~~~~~~~~~~~~~~~~~~~~~~~~~~~~~~~~~~~~~~~~~~~~~~~~~~~~~~~~~~~~~
Batch and Scheduler configuration.
  Queues:  normal (default), high, low, debug
  Features:  "xe" (default), "xk", "x" (xe or xk non-specific)
             "xehimem" (128GB mem), "xkhimem" (64GB mem)
  30 min default wall time, 48 hr maximum
  -lnodes=X:ppn=Y syntax supported.

All SSH traffic on this system is monitored.

06-10-15 17:57
Blue Waters Discounts Available: For details, see:
https://bluewaters.ncsa.illinois.edu/charge-factor-discounts

Questions?  Mail help+bw@ncsa.illinois.edu to create a support ticket.
For known issues:  https://bluewaters.ncsa.illinois.edu/known-issues
Congratulations! You have successfully logged in to the Blue Waters supercomputer!
Login nodes: H2O
When we connect to the system, we land on one of the Blue Waters login nodes. Let’s see the name of the computer that we got onto:
$ hostname -f
h2ologin1.ncsa.illinois.edu
h2ologin1 above is a name of the login node where we landed. You might’ve gotten onto
a different login node, such as h2ologin2 or h2ologin3. If, for whatever reason,
you need to connect to a specific login node, you can use its name instead of the generic
bw.ncsa.illinois.edu, for example:
$ ssh -l username h2ologin3.ncsa.illinois.edu
Note, that training accounts can not connect directly to a specific login node.
There are only 3 login nodes that are shared by all Blue Waters users. Therefore, it is important not to run any compute, data, or network-intensive processes on them.
SSH config
Let us log out from the Blue Waters system for now and have a closer look at the ssh command
that we used above.
$ exit # leave Blue Waters login node
The ssh command requires a lot of typing: we have to type our username, Blue Waters’ address,
then PIN and TOKEN. The chances are, we will make a mistake here or there. To reduce our
chances of making a mistake, let’s create a file that will store some of the information
that we enter above. Execute:
$ mkdir ~/.ssh
$ touch ~/.ssh/config
Now, let’s open that ~/.ssh/config file in a text editor and enter add the following lines:
Host bw
    Hostname bw.ncsa.illinois.edu
    User username

Host bwbay
    Hostname bwbay.ncsa.illinois.edu
    User traXXX
Save and exit from the text editor. Now, let’s login to Blue Waters again:
$ ssh bw
It should prompt you for your password again. What we’ve done is we created a (virtual) host bw.
From now on, whenever we try to connect to bw, we will be, in fact, connecting to
bw.ncsa.illinois.edu. Moreover, if we don’t specify our username, it will use the name we
provided as User parameter.
We can log in to Blue Waters with just 7 keystrokes (+password)!
Connecting to specific login nodes (standard accounts)
Sometimes it is necessary to connect to a specific login node. Change your
~/.ssh/configfile so that you can connect to them using a simplessh h2ologin1(and similar) commandsSolution
Add the following lines to
~/.ssh/configfile:Host h2ologin1 Hostname h2ologin1.ncsa.illinois.edu User username Host h2ologin2 Hostname h2ologin2.ncsa.illinois.edu User username Host h2ologin3 Hostname h2ologin3.ncsa.illinois.edu User usernameSolution for recent versions of ssh
The above solution works but it is hard not to notice the repetition there: host names are very similar, usernames are identical. Recent versions of
sshunderstand so-called patterns. Using patterns we can rewrite the above solution as:Host h2ologin? Hostname %h.ncsa.illinois.edu User username
Working with GUI programs
When we are connected to Blue Waters via ssh, commands that we type in our
terminal are sent to Blue Waters for execution and their output is forwarded
back to our terminal. This procedure works well as long as we are
dealing with the so-called Command-Line Interface (CLI) programs. There is, however, a
different class of programs called Graphical User Interface programs that
require special considerations when working remotely.
Unless you are on Unix, your Terminal (emulator) is a GUI-based program too.
Let’s see what happens when we execute a simple GUI program on a login node. Connect to
Blue Waters and execute:
$ xeyes
Error: Can't open display:
xeyes is a simple program that displays a pair of eyes that track movement of
a mouse cursor. It failed to execute simply because it tried to use a monitor
that does not exist. The solution is to send (tunnel) display instructions to
a local machine using the so-called X Protocol version 11 (X11). For this
solution to work, your machine must have an X server installed and running.
Please refer to our Setup page for instructions on how to
install it on your operating system. This is, clearly, not as efficient as
sending commands to a local monitor but, at least, it allows GUI programs
function properly over ssh. To send display instructions to our local machine,
all we have to do is add an extra flag -X to the ssh command for standard accounts
and -Y flag for training accounts:
$ ssh -X bw
# or
$ ssh -Y bwbay
Now, execute xeyes:
$ xeyes
You should see a nice pair of eyes!

Because we used X protocol version 11, what we have just done is called X11 Forwarding.
To learn more about X Window System and X11 forwarding, please refer to:
X Window System wiki page,
its manual page (man X),
and
a manual page for SSH configuration file (man ssh_config).
What if
-Xdoes not help?If you get a
Can't open displayerror even when using the-Xflag, try the-Yflag instead. This flag has the same effect as-X, but forwarded instructions are not subject to X11 security extension controls
Key Points
Blue Waters general address is bw.ncsa.illinois.edu
Blue Waters uses two-factor authentication
~/.ssh/configstores important connection information
-Xflag enables X11 forwarding overssh